
When I was first trying to start this blog, I was overwhelmed with all of the information out there. Where do I start? How do I know what to pick?!? After doing all that research (I am the planning type), I have compiled a list of the initial steps to take in order to start blogging on your own. I will be creating additional posts in this series as you continue to build your own blog, so be on the lookout for those!
1) First thing is first — you need to pick a name! Without a name, you will not know how to set up any of your accounts, what you want things to look like, etc. This is a rather challenging first step, possibly the most difficult, because once you pick a name it is difficult to change everything. When you are thinking about name options, you want to take your time to make sure that you pick something that you are happy with long term.I started by first writing down words, phrases, ideas, and concepts of what I wanted my blog to be about. Some examples were experience, spark, wisdom, tree, branch (I really like trees 🙂 ), grain, society, and grove. You want to be somewhat careful if you are using a name that is specific to cooking, writing, etc. as it may limit you with your content. For example, I would never think to go to a blog about cooking if I was looking for travel advice!
You can also use the internet to expand upon your list. Try the thesaurus for related words to what you already have. There are even some search engines designed to help with this although they are not always extremely beneficial. Once you have a good amount of words, you can start combining them, looking at different options and adding some filler words. Come up with a few ideas and sit on them for at least a few days. Ask some of your friends and family what they think. And be sure to check online that your name is not already taken!
2) Congratulations! You now have a name! The next step is to register your domain name (the web address, such as www.threeolivesbranch.com). I did this through Bluehost (Bluehost is the host for my blog site, where it lives) because it is FREE!
Hosting your site is easy! If you use Bluehost, you can knock out two steps at once by registering your domain name and selecting your host. Bluehost is definitely an industry leader in this area. They allow you to run your own advertisements and is self hosted which you need if you want to make money off of your blog. You can get to their site here and follow the simple steps to get all set up!
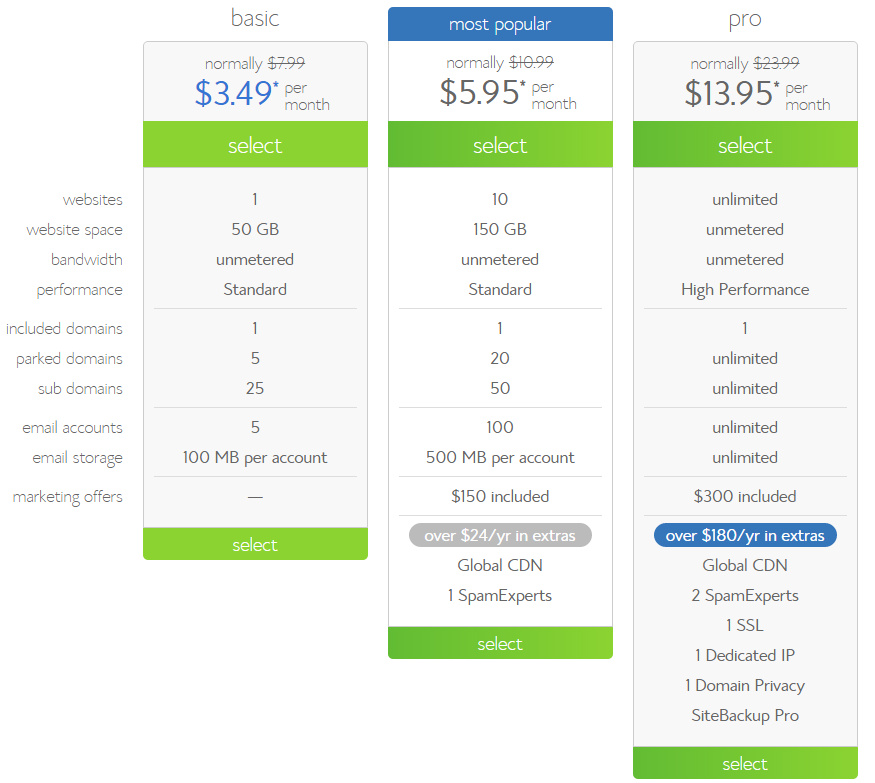
Starting out you only need the basic package out of these options that they will give you:
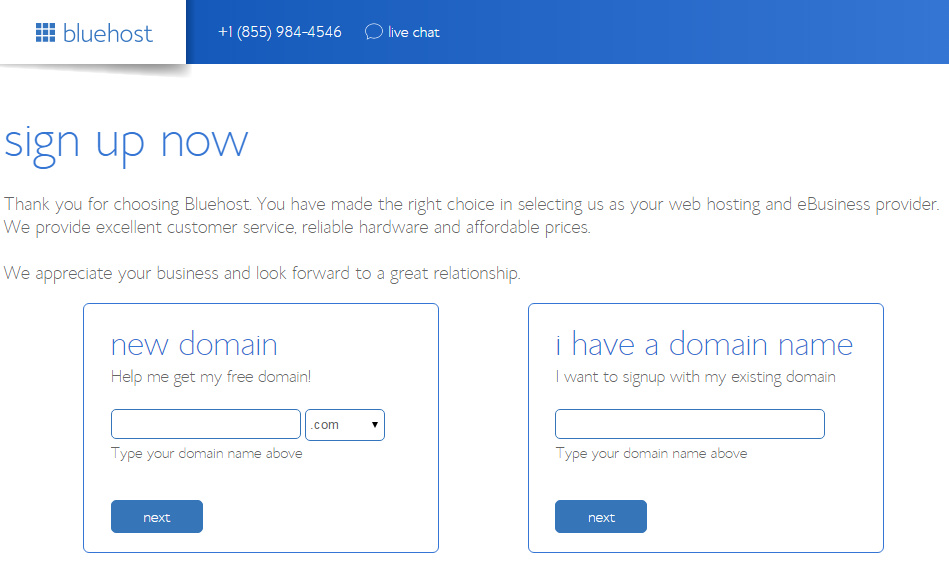
The next page will prompt you to obtain and register your domain name:
They will then give you the option to sign up for many different add-ons. The only one you really need is the domain privacy protection at $1 per month to help keep your site and domain secure. You are all done!
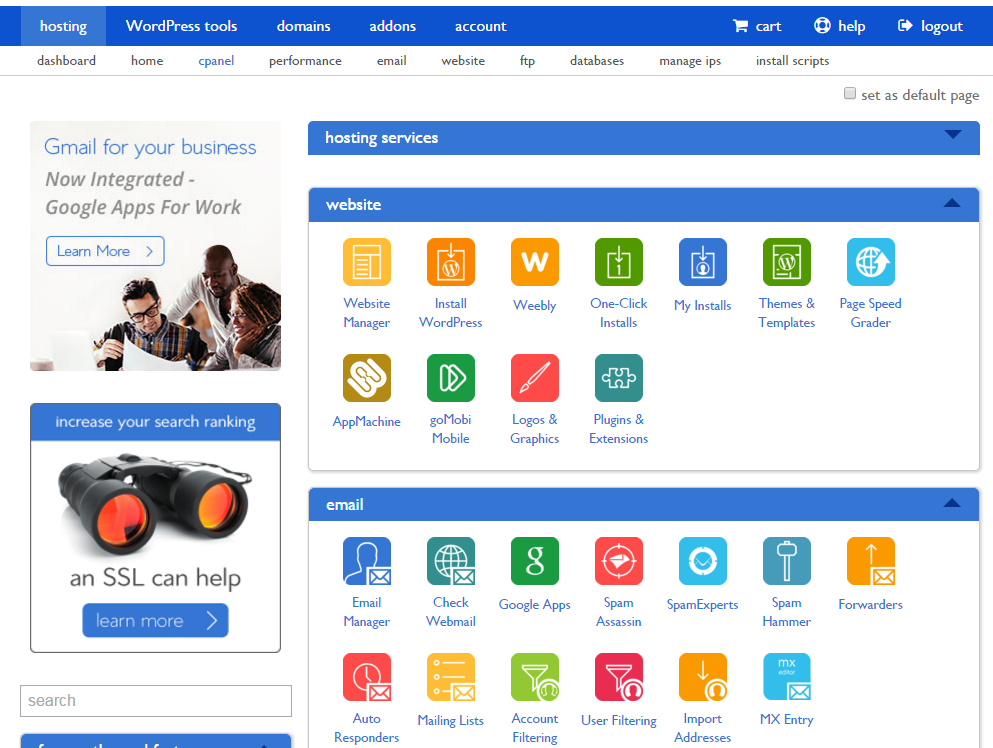
3) Now that you have your bluehost all set up, you need to install WordPress on your Bluehost site. Wordpress is what you use to create your posts and design your site.
To do this, go to your cpanel link from the top of your Bluehost page. On this page you will find various add-ons and installs that you can use. Find WordPress, install, and follow the steps.
Another great thing about Bluehost is they are very helpful. So if you find yourself lost of confused, just open a ticket with them for help and they can assist you in walking through the process and getting everything set up.
4) Now that you have everything installed, you need to find a theme to use for your website. There are a lot of resources out there however the one that I found to be the best deal and the best templates is StudioPress. The great thing about getting a template from this site is that it includes the Genesis framework with the template itself. I use the Divine Theme. You can check out all of the StudioPress Themes here.
Genesis is like the frame of a car. It is the structure underneath everything for the site. The template itself is the design and how it looks, such as the outside of the car, the coloring, etc. So the templates on this site are a great deal! There are also demo sites for the themes where you can play around, click links, and see how the site would look and work in general. Head on over to their site here and check it out!
So in a nutshell, this is all you need to do:
- Pick your name
- Register on Bluehost to get your domain name (web address) and host (where your blog lives)
- Install WordPress on Bluehost
- Download a theme such as StudioPress Themes.
You are all set to be up and running! Now you have the structure and platform that you need to post all of those amazing things that you want to share with the world.
Check out my other posts on your next steps:
- Download Plugins to give yourself more functionality and to make things easier (coming soon!)
- Make your own custom logo for free (coming soon!)
- Set up social media accounts and connect through plugins (coming soon!)
- Monetize your blog – make some money! (coming soon!)
good information
Great tips!
Wish I could have read this about six months ago! I’m sure it will help lots of other newbies, though!