Have you ever wondered how bloggers get on BuzzFeed? Do you wish that your posts were able to get some of that coveted attention? Or maybe you just want to be part of the action and contribute some content? Below are steps on How to Create Posts for Buzzfeed Community and make posts of your own!
 Not knowing much about how all this blogging business worked when I first started, I did know that I loved BuzzFeed and that some of my favorite blogs would always talk about being featured on the site. I knew I needed to find a way to get on BuzzFeed! So after I had started getting my blog rolling, I looked into it and realized the key to getting on BuzzFeed: community posts. The community posts can be seen by anyone on the site, PLUS there are editors that will go through these community posts and you might be lucky enough to be featured on the main site! (Have you ever seen an article that was written by a community member? This is how they do it!)
So in a quest to get on BuzzFeed, I looked into different references and notes on how to write posts, include some content of your own, and not break their rules. Make sure that you check out their terms before you do anything!
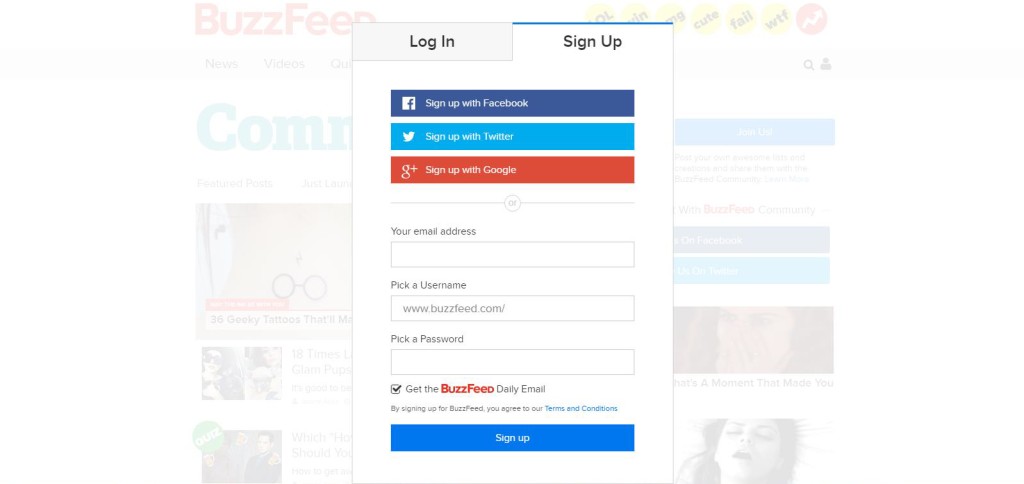
- First, you need to have a Buzzfeed Community account. To do this, go to their community site and you are going to click on the “Join Us” button on the top right corner, then “Sign Up.” You will likely want to sign up by typing in your blog email and a password instead of a social media account so that you can set it up for your site instead of a personal page (unless you want to do that, then go for it).
- After you are set up, the picture next to the search bar will give you a drop down menu for your own account. Make sure you set up your profile as well with a picture, cover photo, and you can even link your social media to it.
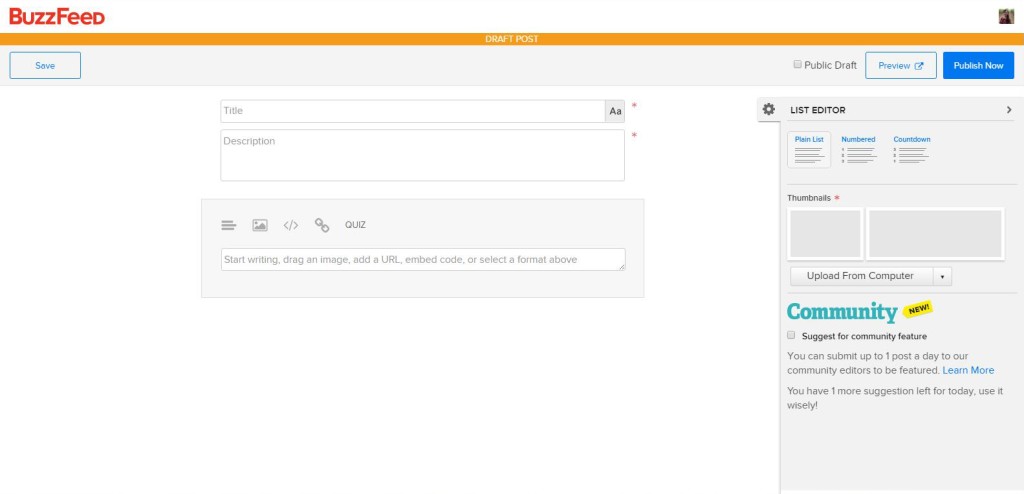
- Now you are ready to get posting! To start a new post, click on the “Make a Post” button or “Start Posting” (depends on what page you are on) and it will take you to a blank draft page.
- You will need to make a title and a tagline. The title should be attention grabbing and descriptive enough to know what it is. They seem to like it when words are included such as “mouthwatering,” “ridiculous,” etc. The tagline should only be one or two sentences, max. Just enough to assist in grabbing attention of the reader as they will likely not want to be reading a short paragraph to figure out if they are interested enough. Check out their main page for some inspiration and examples!
- Now the fun part, adding all the posts! On the right you will see the ability to add the numbered list option which is great for things like a list of recipes, among the other options like quizzes. Typically for recipes, you want to aim for at least 15 if possible, and probably not more than 21 or so. (You don’t want this list going on for days!).
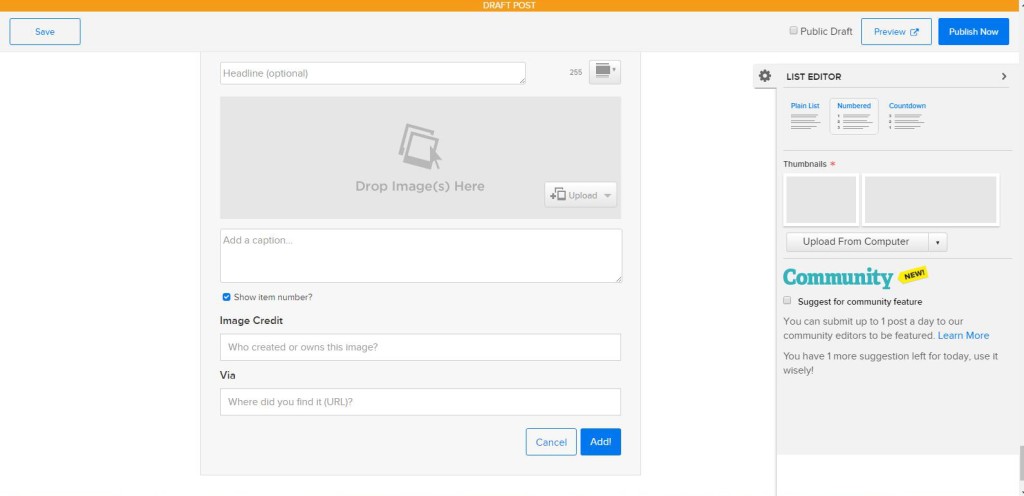
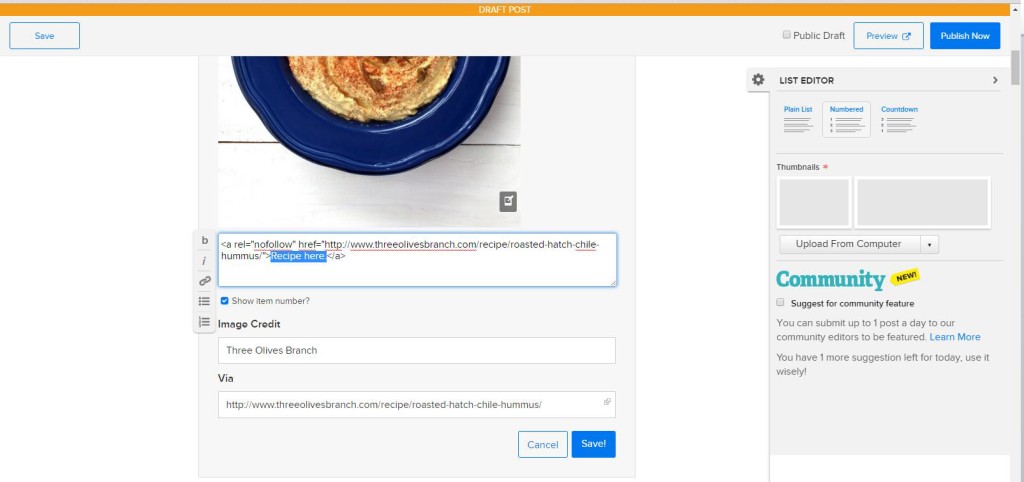
To add each post, click on the picture-like icon. It will open a box to add all the information. You will want to include the name of the recipe or topic, upload a picture of it (make sure the picture is great quality, otherwise you will hurt your chance at being featured!), add a description, add the link, and name the source.
You want to typically say something like “Recipe here.” with a hyperlink to the site that you are pulling it from. (See this post for an example.) To do this, you will first type “Recipe Here” or the words that you want to act as the hyperlink, then click on the chain icon on the left where you will then again paste the copied URL for the site. When you have everything added, click the “Save” button and it will close, adding it to the list. Done!
- Repeat this process until you have everything you need on the list. BuzzFeed does not allow nor support self-promoting, and after a lot of research it seems like you can use 2 or 3 of your own posts from your site in the same list, but that is it. Spread them out throughout the list and make sure that the order you put everything in flows and is appealing. For example, you wouldn’t want all of the egg recipes in this post all at the top, and all the cheese at the bottom, etc. Just drag and drop them until you have the order you want!
Make sure that you are saving your draft here and there just in case, although it does auto save itself once in a while.
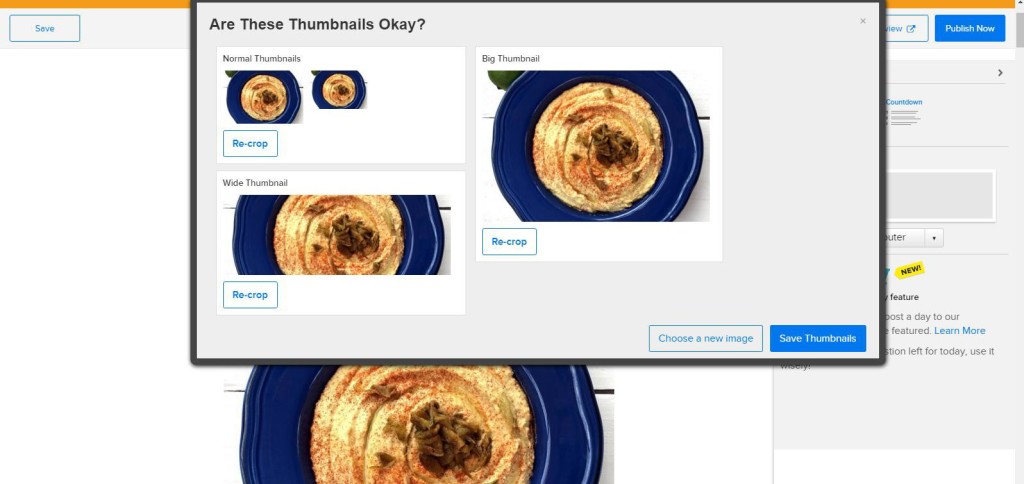
- Now you want to check everything that is on the right hand side. The thumbnail icons are what shows next to the post, so pick a picture from the post that will fit, look good cropped, and supports the message and purpose of the post. You can re-crop each image to get the look you want.
You also want to make sure that you check the box next to “Select for Community Feature” as this will prompt the BuzzFeed staff to check out the post for a potential feature. Apparently they commonly do this regardless, but better safe than sorry!
- Run back through everything one more time to make sure it is polished, and then publish! You are done!
It can take a little while to research, select material, and make the post but it is relatively easy. I have found that a lot of my posts which include 15-18 topics takes about 2 hours or so from start to finish. Don’t just pick the first blogs or articles that you see for your post, you want to make sure that the material is appealing, the picture is attractive, and that it all works together.
Also, it will typically take a little while (around an hour or so) for the links that you include to actually become active. At first the links will just take you right back to the BuzzFeed page itself, but after it goes through whatever program they have to check the links out, it will take the viewer to the correct page. You will want to wait until the links are active before you start sharing!
That’s it! I hope it was helpful in learning How to Create Posts for Buzzfeed Community and inspires you to make some interesting and creative content, whether about blogs or anything else you are interested in. Happy posting!

Thanks so much for sharing this information. I’ve been a member for some time now, but have never taken the time to figure out how to “make a post” – or even that you could do that. And you bet I’ve wondered how bloggers have been included in some of their roundups.
I’m glad it is helpful! I knew there had to be a secret to it! 🙂
This is such a ho cup post Kim. Thanks for sharing!
Sonal
I’m glad it was helpful! 🙂