


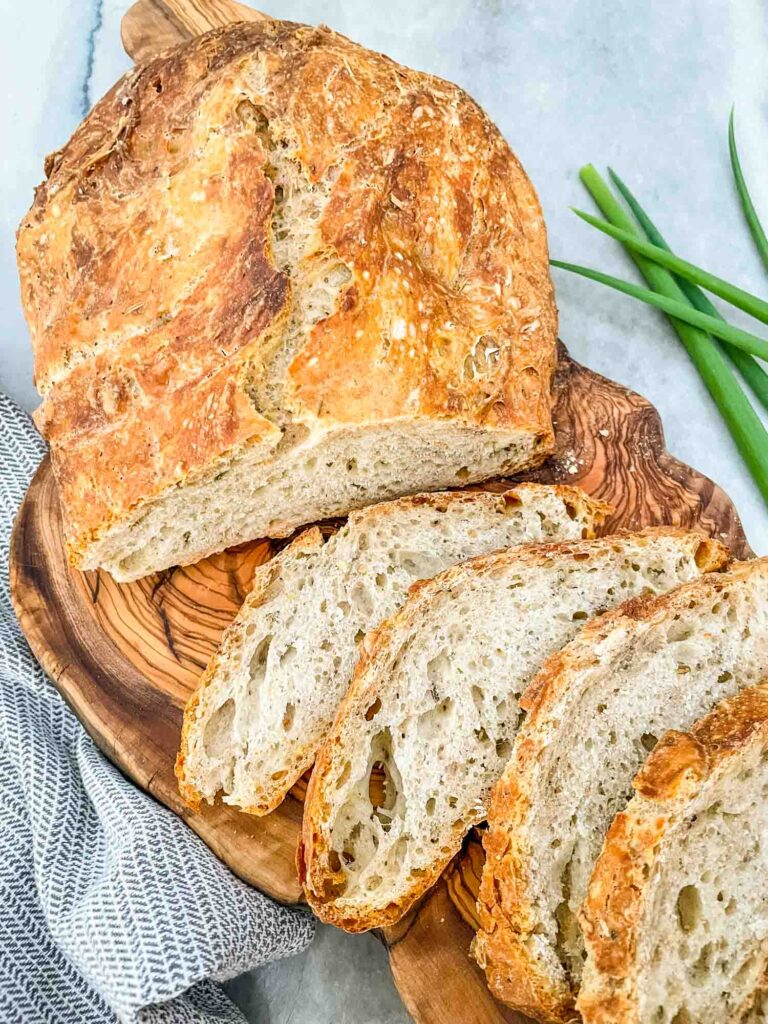
This No Knead Rustic Rosemary Bread is a simple homemade bread that does not require any kneading!

Why You Will Love This Recipe
I am a lover of homemade, fresh bread. The smell of this homemade rustic bread and yeast is just intoxicating.
But I am also not a fan of kneading or complicated bread recipes. I mean, I will do it if I want the bread, but I would prefer not to.
This easy homemade bread recipe is my go-to homemade bread recipe because it is SO simple to make.
To make this rosemary bread, all you need (“knead” lol) to do is mix everything together, let it sit, and bake it. That is literally it.
It has never NOT worked for me.
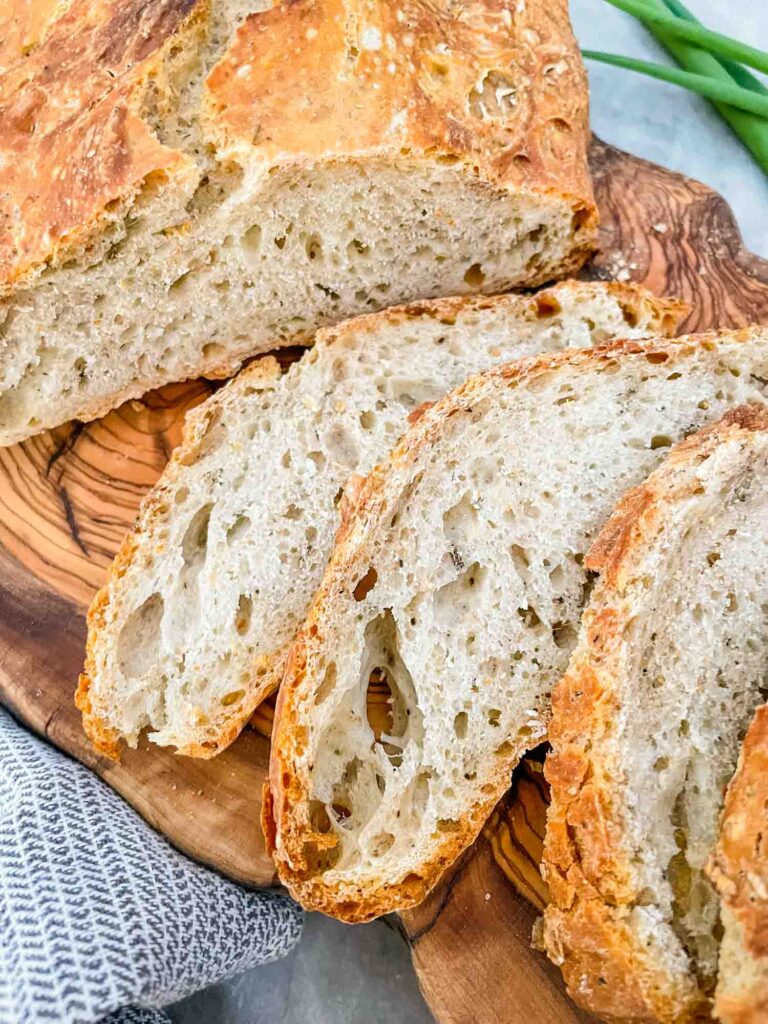
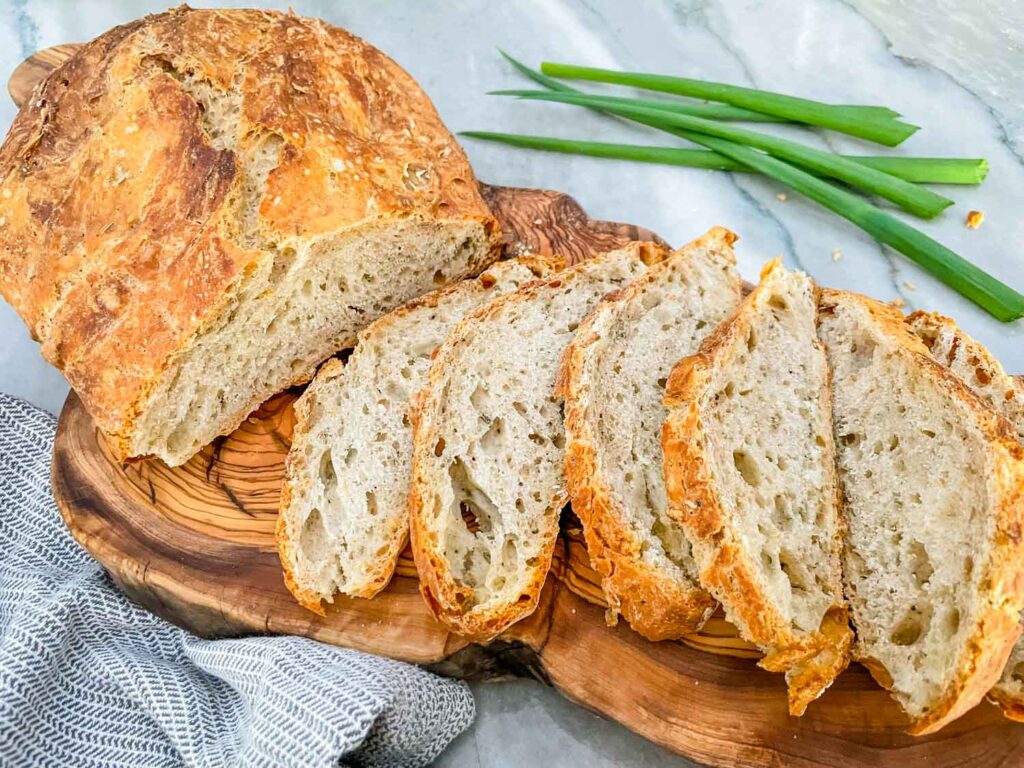
No Knead Rustic Rosemary Bread is a sturdy, dense bread, much denser than French bread, which I love. It holds up well to being buttered, used as garlic bread, or doused in sauces and soups without disintegrating.
Ingredients
These are the ingredients you need for homemade rustic bread:
- All-Purpose Flour
- Water
- Dry Instant Yeast
- Dried Rosemary
- Salt
- Black Pepper
Regular all-purpose flour works perfectly in this recipe. No reason to use bread flour!
Using instant yeast in this recipe allows it to be no-knead!
Equipment
To make this recipe, you will need:
- Measuring Cups
- Measuring Spoons
- Large Bowl
- Plastic Wrap or Bees Wax Wrap
- Dutch Oven
Instruction Overview
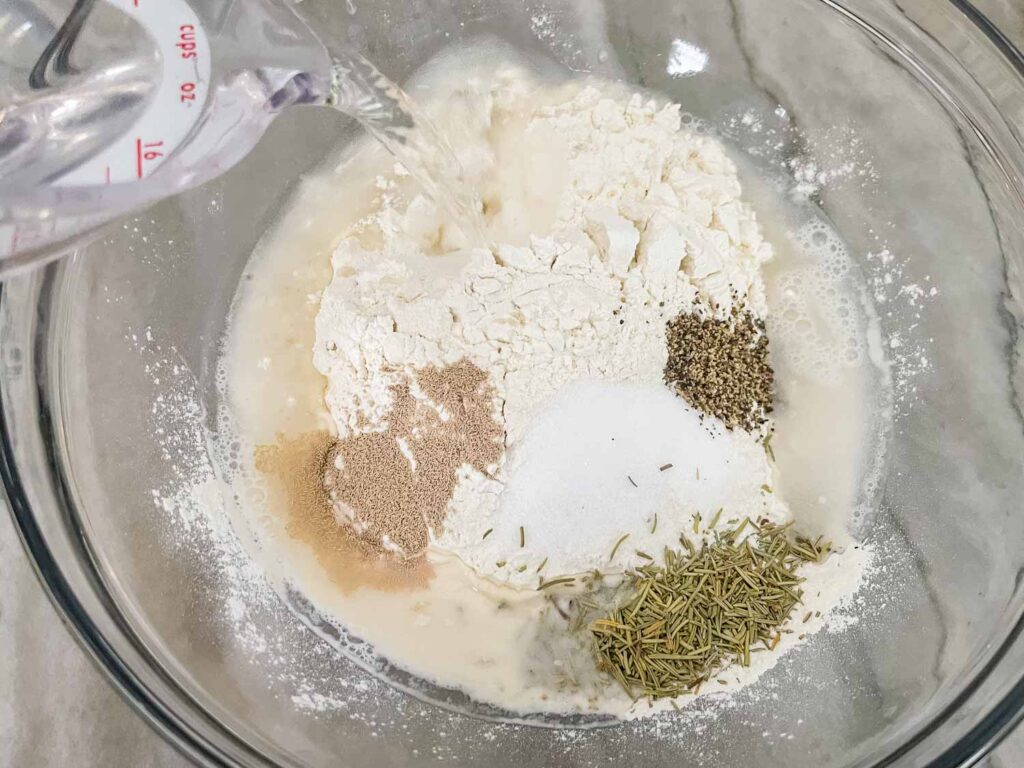
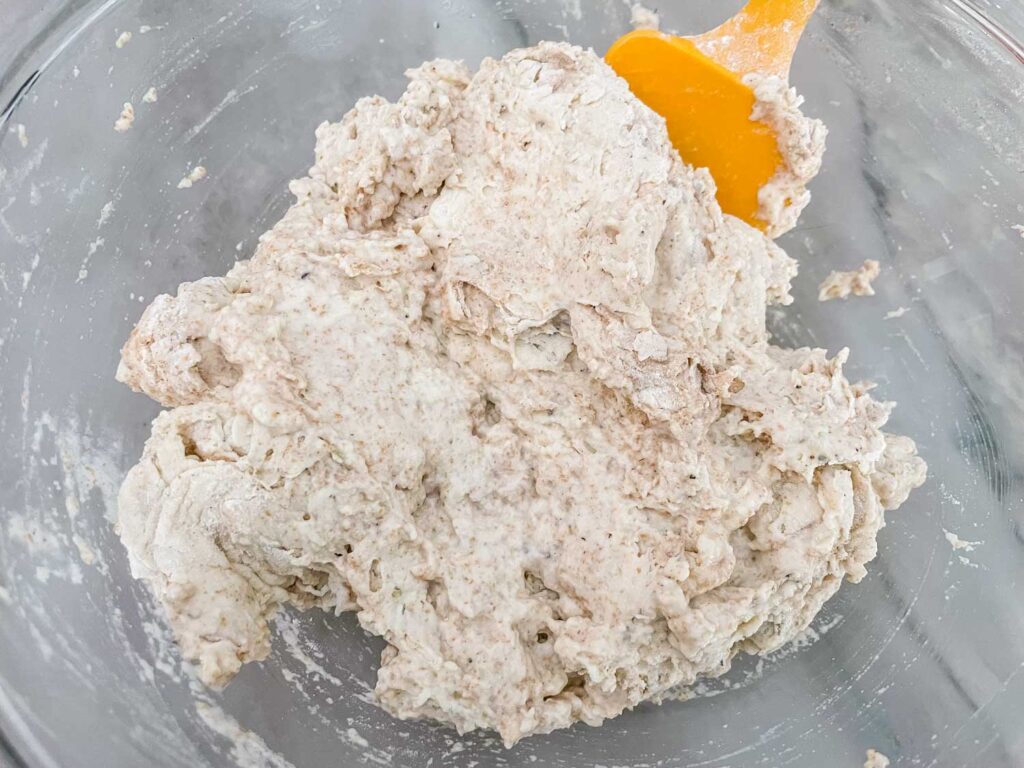
Mix all of the ingredients together in a large bowl.
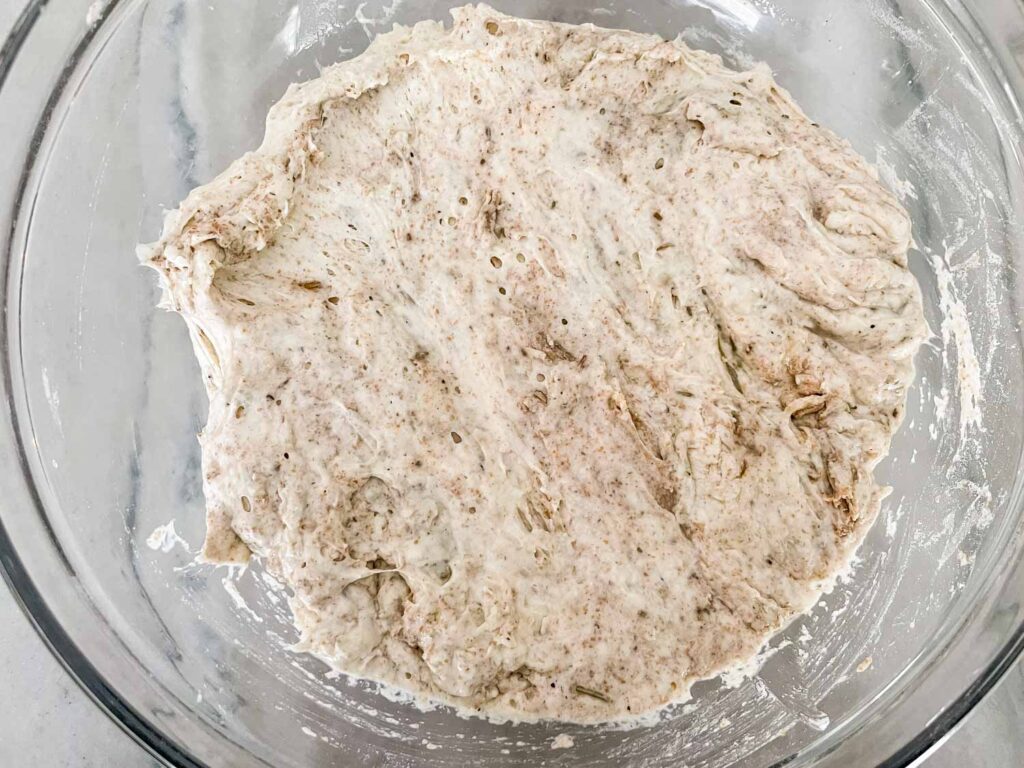
Cover with plastic wrap and let sit 8-36 hours, ideally overnight.
Preheat oven.
Pull the dough out of the bowl and shape it roughly into the shape you want to bake it in.
After preheating for 30 minutes, add some flour to the bottom of the pot and place the dough in.
Bake with the lid on for 30 minutes.
Remove the lid and continue baking 15-30 minutes until the crust is a golden brown.
Let cool completely before slicing.
Modifications and Substitutions
I have made the bread with 1 cup of whole wheat flour and the rest all-purpose, and it turned out great. It just rose a little less. I would not recommend swapping out for more whole wheat with this specific recipe as it can be very dense and tough.
You can have fun with this rustic bread recipe and use different flavors. This rosemary version is my absolute favorite so far, but I also love my lemon thyme rustic bread!
Kim’s Tips
You want to make sure to use a plastic wrap or bees wax wrap on top of the bowl, not just a towel. Just a towel could let moisture escape and absorb, which could negatively affect the dough.
If you do not have a bees wax wrap set, I highly recommend it. It is a reusable plastic wrap of sorts that is made from bees wax. It is very effective and I love the eco-positive value of it.
I mix up the dough the day before I want to use it, any time of day, and just let it hang out.
FAQs
Is it cheaper to make your own bread?
What is rustic bread made of?
How long does rustic bread last?
It can be chilled to extend shelf life however will become a little tougher.
Can I bake the bread with a resting time less than 8 hours?
If it still looks thick, dry, and low in volume, it has not risen enough and will be tough.


No Knead Rustic Rosemary Bread
Equipment
- Measuring Cups
- Measuring spoons
- Plastic Wrap or Bees Wax Wrap
Ingredients
- 3 cups all purpose flour
- ½ teaspoon instant yeast
- 1 ½ Tablespoons dried rosemary
- 1 ½ teaspoons salt
- ½ teaspoon black pepper
- 1 ½ cups water
Instructions
- Combine all of the ingredients in a large mixing bowl. The dough will not be overly sticky but should come together. Add just a little water at a time if needed to incorporate all the flour.3 cups all purpose flour, ½ teaspoon instant yeast, 1 ½ Tablespoons dried rosemary, 1 ½ teaspoons salt, ½ teaspoon black pepper, 1 ½ cups water
- Cover the dough with plastic wrap and put a towel over the top to help it seal. Set the bowl aside for at least 8 hours to rise (I have gone as long as 24 hours).
- When ready to bake, heat oven to 450°F. Place a large cast iron pot (Dutch oven) on the medium or medium low rack while preheating for it to get hot.
- Use a spatula to scoop the dough into the hot pot. (If preferred, shape the dough on the counter during preheating but I find it is easy to drop the dough in a rough circle straight into the pot).
- Place the lid on the pot and cook at 450°F for 30 minutes.
- Remove the lid and let cook an additional 15 minutes to further brown. If it looks or smells done sooner, remove from oven sooner.
- Let the bread cool completely on a cooling rack.


This recipe is pretty much fool proof. The prep only took five minutes and the cook time was spot on. My house smells amazing and I’ve already had three slices. I would highly recommend this, especially for a novice or anyone light on time. Can’t wait to make another for my family this weekend!
So glad you liked it, Kelley! 🙂
I tried making a recipe that had a lot of ‘exacts’. Knead the bread for 7 minutes. Put the yeast in this temperature water. Coat it in this much oil. Safe to say? That recipe was a totally gooey flop. This recipe? Completely foolproof! Makes a beautiful, crusty bread with a wonderfully moist center. A nice, gentle taste, it’s amazing! This is going right in my recipe book!
How wonderful! I am so glad this worked out so well for you! 🙂
Can I use fresh rosemary (I grow my own)? If so, is there a difference in the amount?
Oh! And what size dutch oven pot?
I use a 4 quart with plenty of space. You can use large or even smaller like 2.5 and there will be plenty of room! Just not the tiny ones!
Hi Lauren,
Absolutely! I would use 4 Tablespoons (1/4 cup) of the fresh rosemary. Enjoy!
I don’t have a Dutch oven. Is there anything else I can use for baking this bread?
Hi Susie,
You could use a heavy-bottomed pot with a lid. Something not thin is best so it heats well and does not burn.
After 15 hours, my dough had risen well, but was super wet and wouldn’t hold its shape as I tried to form it into a ball. It just oozed into its own ugly blob and also didnt rise any further while it set (40 min while oven and pot preheated). Is this normal? Did i do something wrong, or should I just use slightly less water next time? its cooking now and may turn out OK. but it sure wasn’t the shaped loaf I had expected!
Hi Tami,
It is going to seem a little wet since this is a no-knead recipe. I would also check your yeast expiration date, and if you used instant or “regular.” It is going to be a little wet and soft since this is a no knead recipe, which is very different than a kneaded dough. Also consider your environment like with all baking (are you in a really humid area? Super dry? etc) This recipe is very soft/wet feeling compared to a traditional bread, because it is a no knead quick bread style. I feel like you are fine but expecting a dry, tight dough which is not what a quick bread style recipe is going to be.