
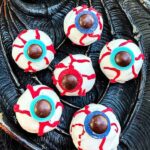
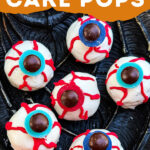
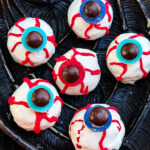
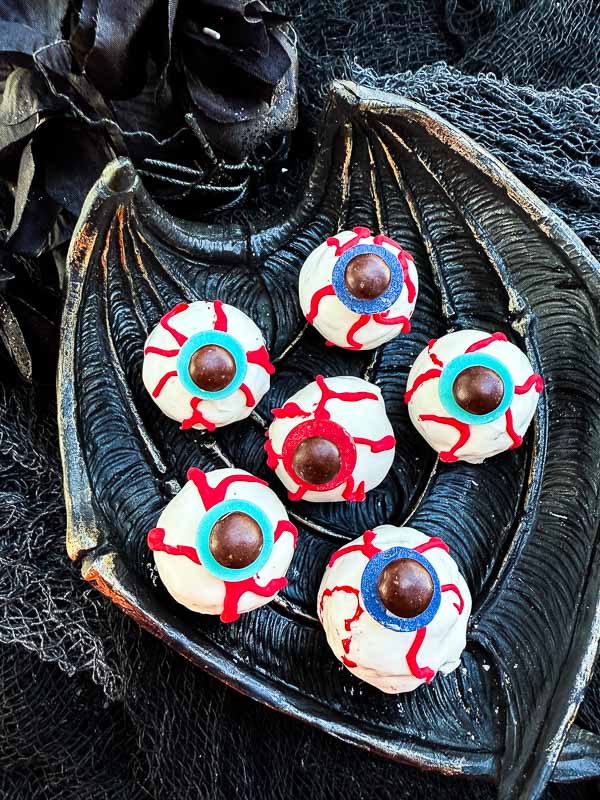
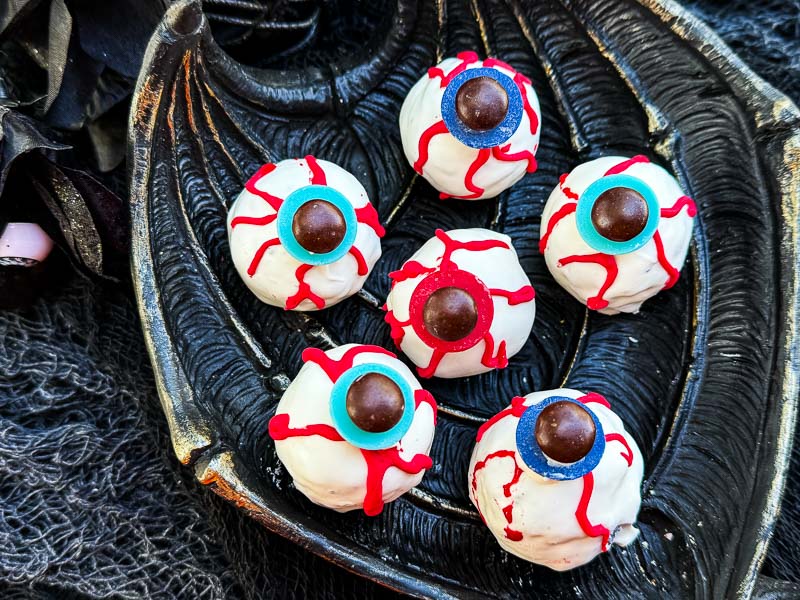
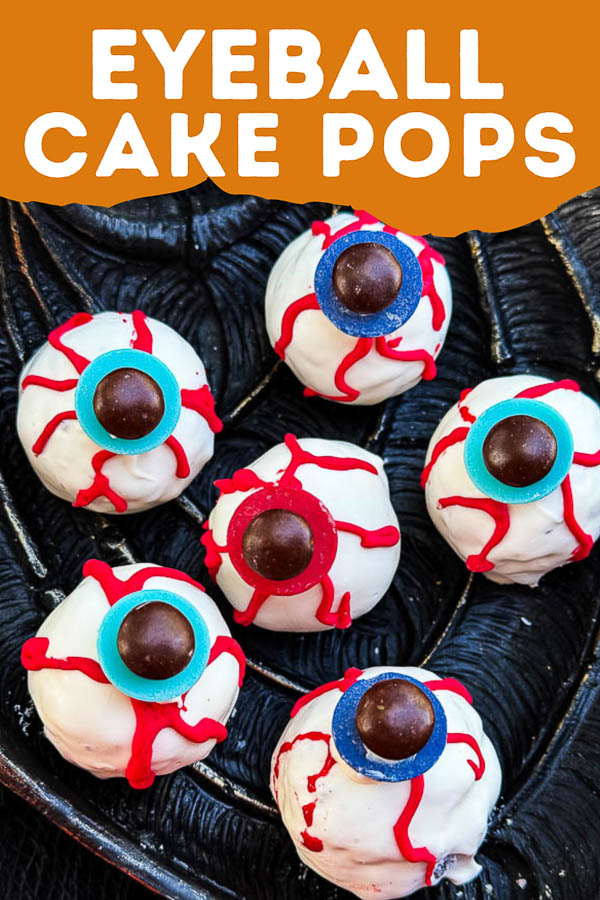
Make a spooky addition to your Halloween party with these Halloween Eyeball Cake Pops! Cake bites are decorated with icing and candies to make colorful, bloody eyeballs.
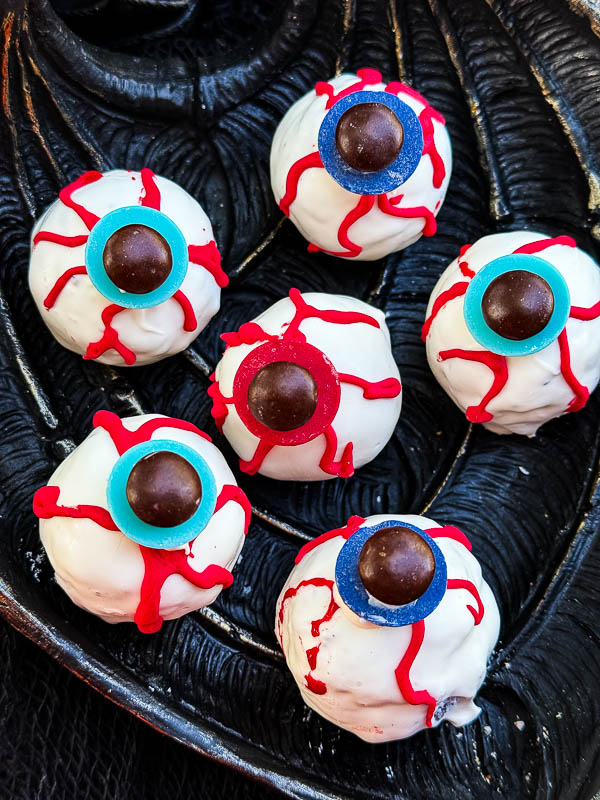
Table of Contents
Ingredients
Let’s talk a little about the ingredients you need for this recipe. Full quantities and recipe details can be found at the bottom of this post.
Cake – use any flavor that you like. You can either use a cake mix and follow the instructions listed, or even use a cake that is already made.
Frosting – If using a dark cake mix, you will not see a colored frosting no matter what. If a white or yellow cake mix, you can color the frosting for a subtle color filling.
Bright White Candy Melts – it is key to get the bright white as regular white has a yellow tint to them. You could also use almond bark. White chocolate is NOT recommended as it is very finicky when melted and it has a yellow tint.
Eyeball Colored Candy Melts – use any colors you like, such as royal blue, light blue, or even red or bright green!
Brown Chocolate Candies – I use M&Ms
Red Gel Frosting/Icing – you can find this as a tube in the baking section of many stores. I like the gel that is almost a little transparent but you can use solid opaque red as well.
Instruction Overview
First make your cake as per package directions.
Let the cake cool and then gently break apart into a large bowl.
Add a half cup of frosting and mix into the cake with a stand mixer. This can also be done by hand but the mixer gives a more even result. Keep adding more frosting 1/4 cup at a time until you can press the cake mixture together and it sticks.
Use a cookie scoop to shape into round balls and place on a plate or baking sheet.
Chill for approximately 20-30 minutes until they firm up some which will make them easier to coat.
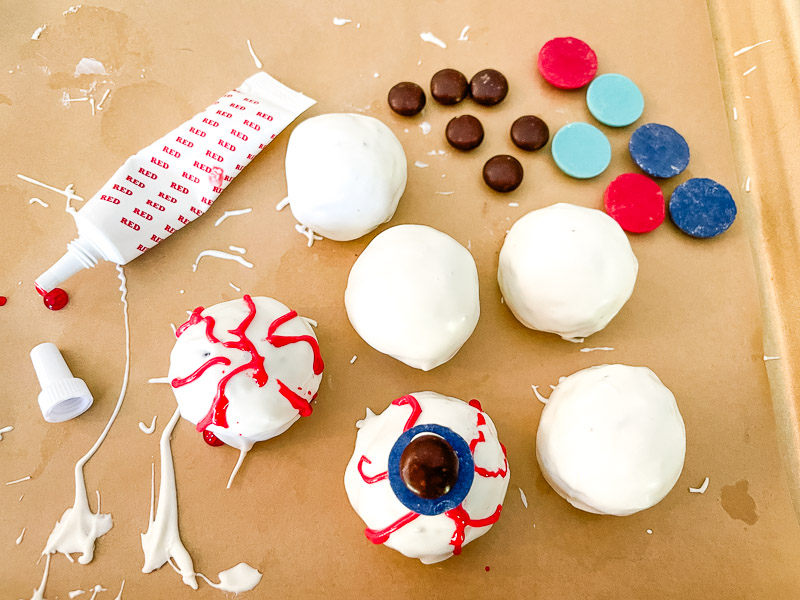
Melt your candy melts in a small or medium bowl in the microwave in 30 second intervals, stirring each time, until fully melted. Make sure to do this per package directions, typically at 50% power. Do not overheat as it will seize!
Place the cake balls into the candy melts and coat with a fork or spoon.
Scoop out each ball out, resting on a fork, and bang on the side of the bowl to remove the excess chocolate.
Place the coated balls on a parchment lined sheet.
Let them dry completely before finishing decorating.
Use a red gel to make the red squiggle lines on the eye, coming from a central point where the iris will go. Then use more red gel or some leftover candy melts to adhere the iris in place (I find the candy melts are better at making sure they stick and do not fall).
After the colored iris, do the same with the brown candy piece for the pupil.
Let dry to harden.
These cake pops can be stored in an airtight container for up to a week, or two weeks in the refrigerator.
Kim’s Tips
After chilling, the cake balls being cold will make the candy melts harden faster. This means you will likely need to reheat the melts more frequently. Alternatively, you can let them come to room temperature just a little but they will be more fragile when coating. It is your call what you would rather deal with!
If the candy melts are not warm enough, you will get a very rough and uneven finish on the cake balls. It is best when in doubt to reheat the melts for 20-30 seconds to get a clean and smooth coating.
The final surface of the cake pop bites will be very susceptible to the surface of the cake before coating. Large bumps or craters will show.
With how much the cake mix volume and size is changing these days, you might end up with more or (more likely) less pieces at the end. If you need a certain number of pieces, always aim high to accommodate these package differences and/or production issues.
More Halloween Desserts
Halloween Desserts
Just a few of our Halloween dessert recipes!
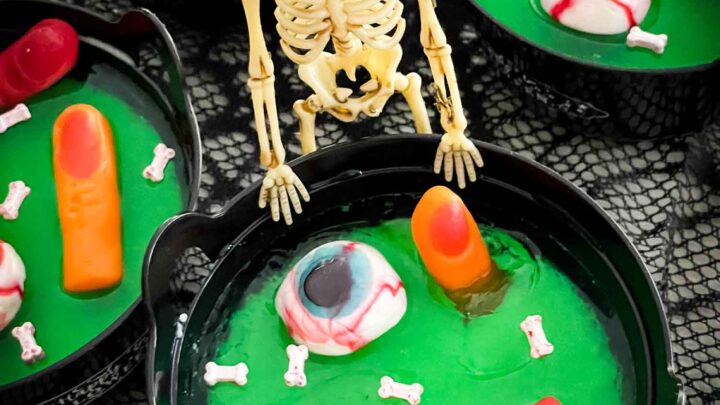
Halloween Jello Cauldrons
A delicious and spooky cauldron full of Jello and decorated with bones and body parts!
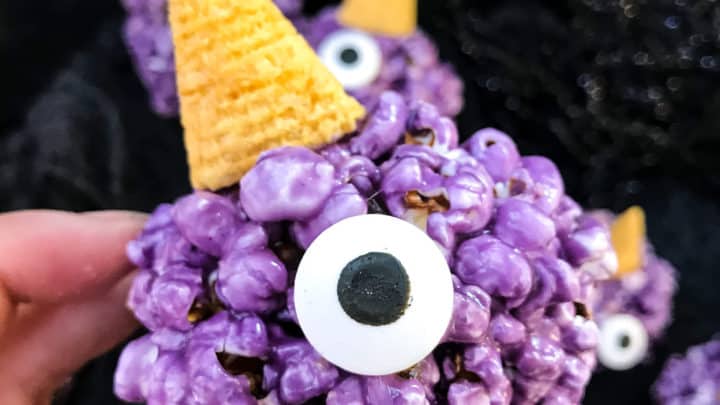
Purple People Eater Halloween Popcorn Balls
A Halloween popcorn ball all dressed up as a monster that looks like the Purple People Eater!
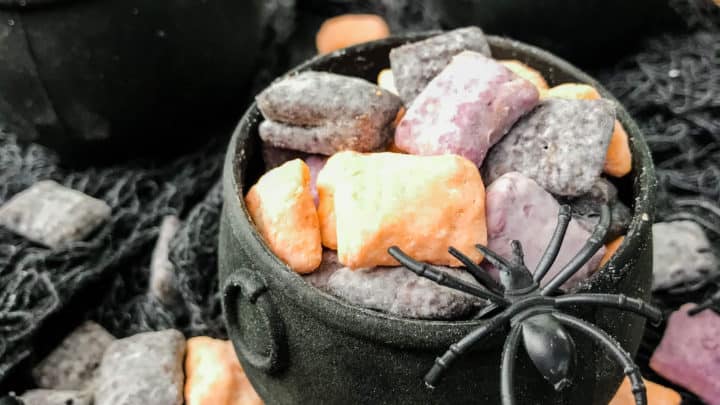
Halloween Puppy Chow
A classic sweet and salty snack, these Muddy Buddies are dressed up for the holiday!
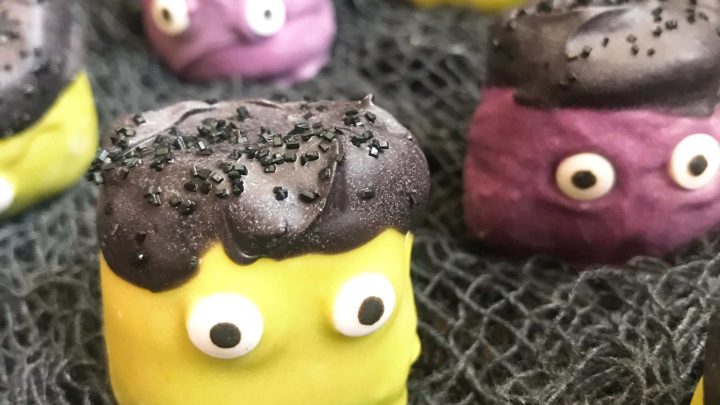
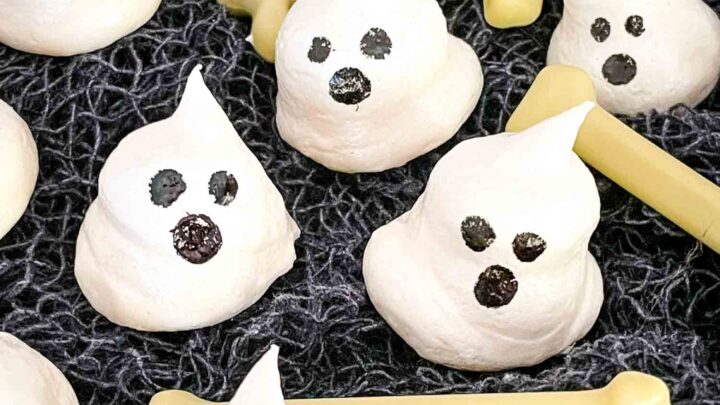
Halloween Candy Dipped Monster Marshmallows
Adorable marshmallows dunked and decorated to look like monsters.
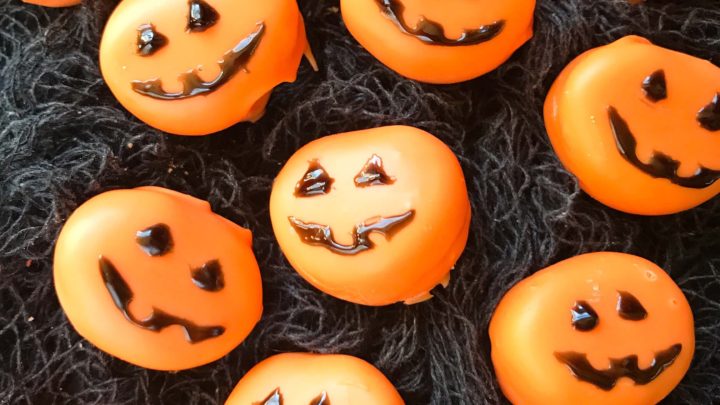
Halloween Candy Dipped Jack-O-Lantern Pumpkin Marshmallows
Make a patch of Jack-O-Lanterns with these candy coated marshmallows!

Eyeball Cake Pops
Equipment
- Fork
- Large Cooking Spoon like a large tablespoon
- Hand Mixer
- Small Bowls for melting candy melts
- Baking sheet for placement
Ingredients
- 1 batch boxed cake mix flavor of choice (see note 1)
- 1 cup frosting about half of a can, any flavor (or more as needed)
- 3 cups bright white candy melts (see note 2)
- 36 royal blue candy melts or eye color(s) of choice
- 36 brown M&Ms or similar round candies, brown or black
- 1 red gel icing for the eye lines
Instructions
- Make your cake as per the box directions. Let cool.1 batch boxed cake mix
- Crumble the cakes into a large bowl.
- Add 3/4 cup frosting to the large bowl.1 cup frosting
- Use an electric hand mixer to combine the frosting and cake. It should look somewhat like wet sand and not be smooth. Approximately 1 minute. If needed, add more frosting so that the cake sticks together well when pressed together.
- Use a cookie scoop to scoop out the cake mixture and shape into a ball. If needed, press it together by squeezing. Place each ball on a baking sheet.
- Chill the shaped cake 30 minutes for them to harden up some and to make them easier to coat.
- Melt your candy melts by heating in a small bowl in the microwave at 50% power (per package directions), stirring every 30 seconds until smooth.3 cups bright white candy melts
- Place a cake ball in the candy melts and use a spoon to coat completely. Lift the cake out of the chocolate with a fork and bang against the bowl rim to knock off the excess chocolate.
- Place the coated cake on a parchment lined baking tray to set.
- Repeat with all cake pieces, melting more candy melts as needed.
- When hardened, use the red gel icing to make squiggle lines from the top center down the sides to represent the eye veins.1 red gel icing

- Use melted candy melts to secure your colored iris disc at the top center of each ball where the red lines meet. I like to put the rounded side down for a flat top surface.36 royal blue candy melts
- Then use another small amount of melted candy melts to stick the brown M&M in the center of the iris on each ball.36 brown M&Ms
- Let the cake balls completely set and harden.
- Store cake bites in an airtight container for up to 1 week.

Notes
- The yield will vary with the exact cake brand you use, plus the ongoing adjustment of smaller box sizes. If you need a specific number of treats, make sure to over estimate.
- 1 cup of candy melts is approximately 6 ounces in weight. You will get 3-4 mummies per 1/4 cup melts depending on ball size and how much you leave on each piece.