


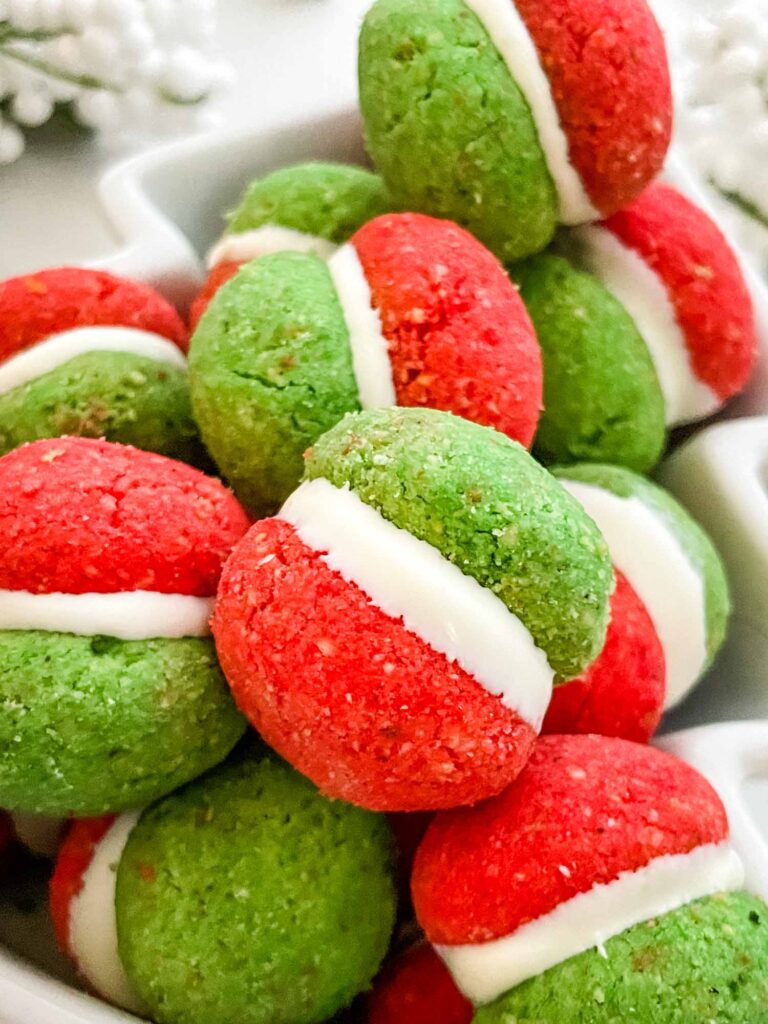
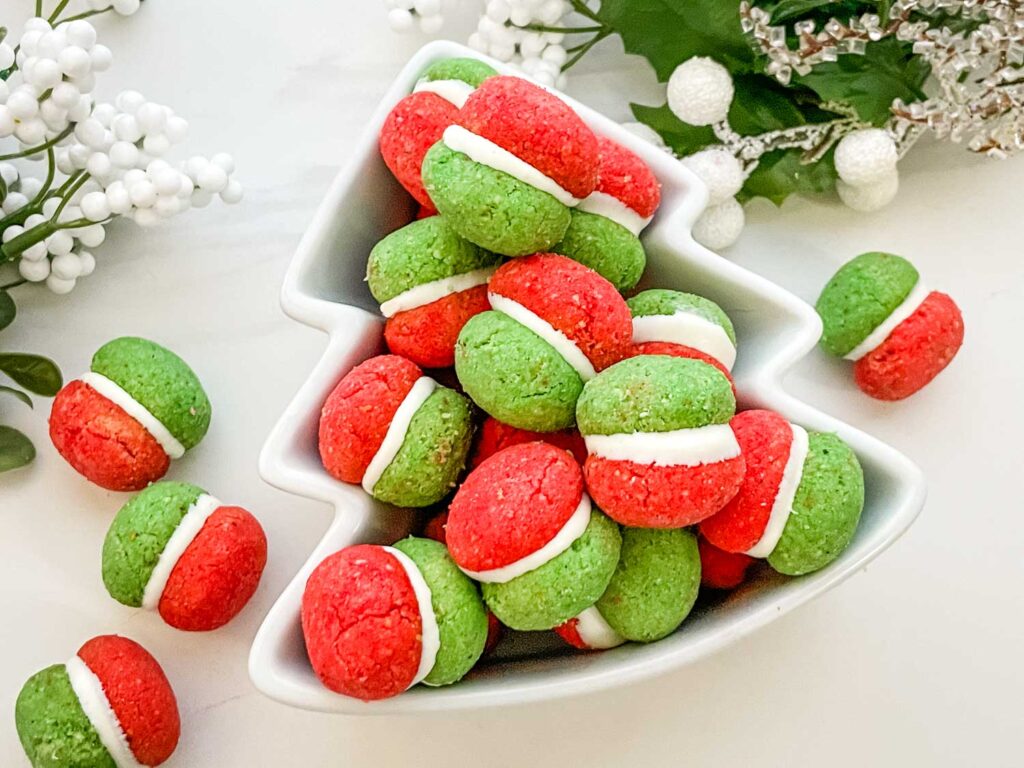
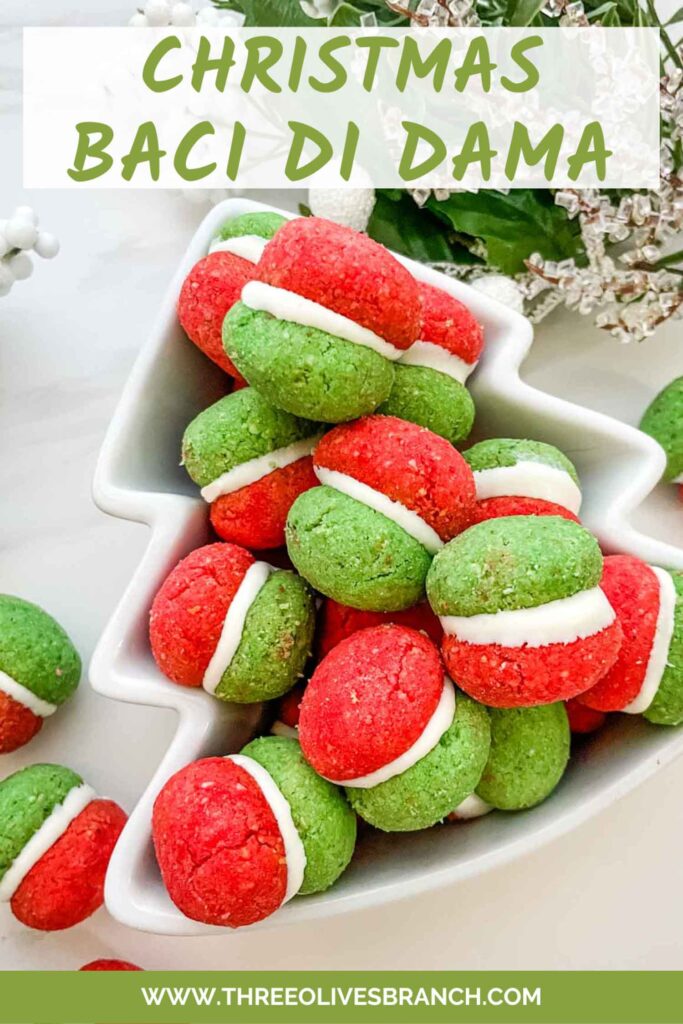
Bring some festive and bright colors to your Christmas cookie platter with these Christmas Baci di Dama Cookies! Classic hazelnut Italian cookies are dressed up for the holidays in red, white, and green.
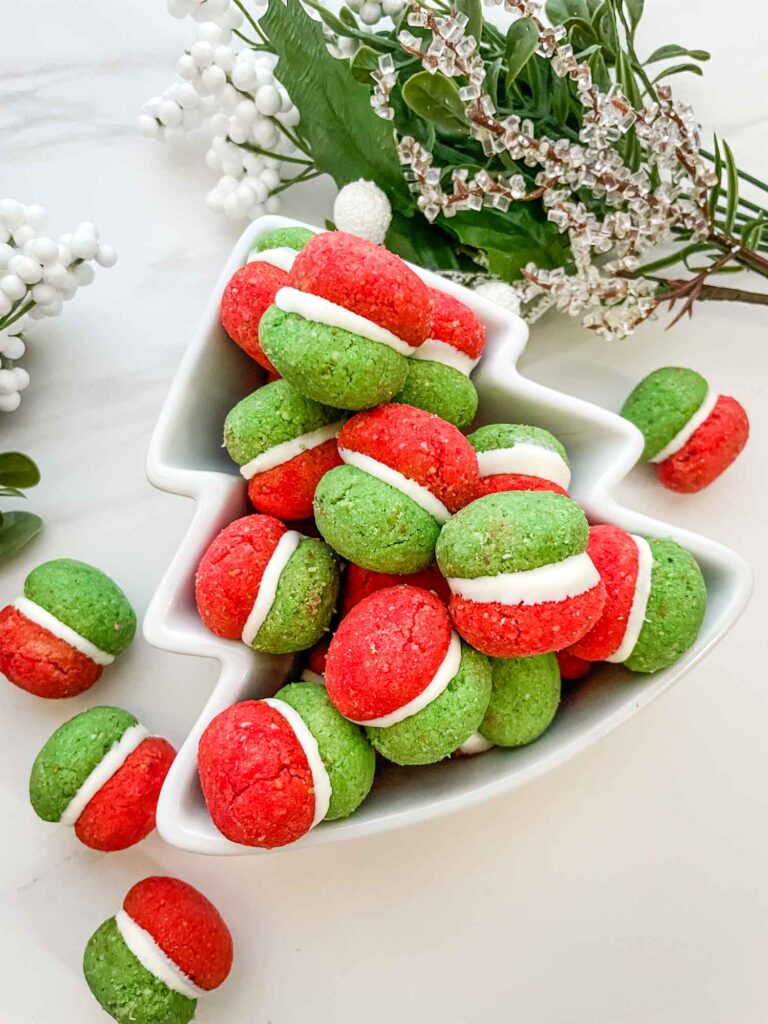
Table of Contents
Why You Will Love This Recipe
Baci di Dama, which translates to “Lady’s Kisses” in Italian, are delightful hazelnut cookies that are traditionally made in the shape of a kiss by sandwiching two small cookies together with a layer of chocolate.
These cookies are known for their rich, nutty flavor and melt-in-your-mouth texture.
Made in red, white, and green, these Italian cookies are all dressed for the Christmas season! Plus, they look like the Italian flag!
Ingredients
For full quantities, see the recipe card below.
Hazelnuts – a classic Italian nut! You could also use almonds or walnuts if desired.
All Purpose Flour – we are just using a little bit to help hold everything together
Sugar
Unsalted Butter
Cornstarch
Vanilla Extract
Salt
Bright White Candy Melts– these cookies are traditionally filled with milk or dark chocolate but we are using white to keep the colors Christmas themed. Candy melts are what I prefer because they melt well and give you a bright white color option. You can also use white chocolate chips but they have a little yellow tint to them.
Green Food Gel – food gel is better to use than food coloring because you get a more concentrated color with less liquid, which means it is less likely to affect the baking of the cookies
Instruction Overview
For full instructions and details, see the full recipe card below.
First toast your nuts in a medium skillet over medium heat until fragrant.
When slightly cool, use your hands or a towel to rub most of the skins off of the nuts.
Add the nuts, flour, cornstarch, and salt to a food processor and blend until coarsely ground.
Add the butter and vanilla and process to combine.
Split the dough into two medium bowls. Add one food color to each bowl and mix to combine.
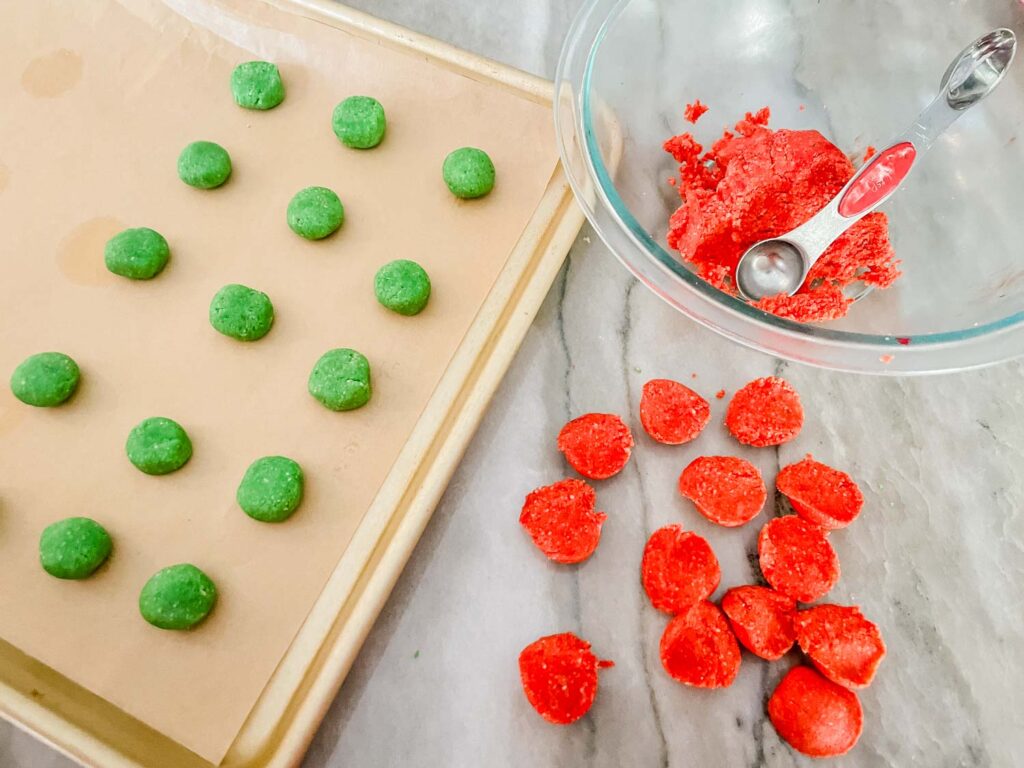
Use a 1 teaspoon measuring spoon to scoop out the dough.
Portion out the dough and roll into a ball, and then slightly flatten, and place on the baking sheet 1 inch apart.
Bake at 350 until just turning brown on the bottom edges.
Let cool completely and then melt your candy melts.
Pair up a green and red cookie. Dunk the flat bottom edge of one into the candy melts, and stick to the other.
Lay the cookies on a counter or something flat and let cool to harden.
Modifications and Substitutions
Hazelnuts are a classic Italian nut. But you can also use almonds or walnuts if desired.
I use bright white candy melts to sandwich the cookies together and keep with the Christmas color theme. The more traditional way is using milk or dark chocolate which you can do if preferred. Regular white candy melts and white chocolate chips will give you a little yellow tint.
Kim’s Tips
Toasting the nuts is key to bring out their best flavor!
Food gel is recommended and not food coloring. The gel is much more concentrated which means you get better color with less moisture being added. If you add too much moisture with a food coloring, it can negatively affect the quality of your cookies.
I have found that the bottom of the cookies brown more when using parchment paper instead of a silicone baking mat. Use whichever you prefer.
After sandwiching together, the cookies might slightly slide while the candy melts are setting. This happens fast! So keep an eye out and adjust any that are sliding as needed.
FAQs
What does Baci di Dama mean?
Where did the Bacio di Dama come from?
How do you pronounce Baci di Dama?
More Christmas Cookies


Christmas Baci di Dama Cookies
Equipment
- Scale ideal when baking, but cup measurements are also provided
- Measuring Cups
- Measuring spoons
- 2 Medium Bowls
- 2 Parchment paper or silicone baking mats
Ingredients
- 1 cup hazelnuts
- 2 ½ ounces all purpose flour (approximately 1/2 cup)
- 1 ¾ ounces granulated sugar (approximately 1/4 cup)
- 2 Tablespoons cornstarch
- ¼ teaspoon salt
- 5 Tablespoons unsalted butter chilled, cut into 1/2 inch pieces
- ½ teaspoon vanilla extract
- 4 drops red food gel more as needed, see note 1
- 4 drops green food gel more as needed
- ½ cup bright white candy melts or white chocolate chips, see note 2
Instructions
- Preheat oven to 350℉ with racks in the upper middle and lower middle positions.
- Toast your nuts by placing them in a skillet over medium heat, tossing regularly, until fragrant, about 3-4 minutes.1 cup hazelnuts
- Let the nuts cool slightly and rub them to remove most of their skins. This can be done with your hands or putting them in a clean towel.
- In a food processor, combine the toasted nuts, flour, sugar, cornstarch, and salt. Process until the nuts are coarsely ground.2 ½ ounces all purpose flour, 1 ¾ ounces granulated sugar, 2 Tablespoons cornstarch, ¼ teaspoon salt
- Add the butter and vanilla and process again to combine. The nuts will be closer to finely ground by now.½ teaspoon vanilla extract, 5 Tablespoons unsalted butter
- Separate the dough into two bowls. Add one food coloring to each bowl and mix to combine (this is easiest when done with your hands).4 drops red food gel, 4 drops green food gel
- Use a 1 teaspoon measuring spoon to scoop out dough, and roll each one into a ball. Then slightly flatten. Repeat with all dough of both colors.
- Place the dough balls on two parchment or silicone baking mat lined baking sheets, 1 inch apart.
- Bake until the bottom edges of the cookies are starting to turn a light golden brown, approximately 15-17 minutes.
- Let the cookies cool completely on the baking sheets.
- Melt your candy melts as per package directions.½ cup bright white candy melts
- Take one red cookie and dunk the flat side into the candy melts, just enough to coat. Stick it against the flat side of a green cookie. Place on a flat surface to harden.
- Repeat with the remaining cookies.
- Once they are all set, store in an airtight container.
Notes
- Food gel will give you much brighter color than food coloring as it is more concentrated. Regular food coloring can be used however you will end up with lighter colors as adding too much of it will impact the consistency of the dough.
- I prefer bright white candy melts because they are much easier to work with and a great bright white color. Regular white candy melts and white chocolate chips will work but have a yellow tint to them.