
The holidays are here! I love to cook and bake things that are representative of the season, and these Peppermint White Chocolate Sweet Rolls are a perfect treat for your holiday breakfast or brunch!
Table of Contents
Why You Will Love This Recipe
Peppermint White Chocolate Sweet Rolls are a delightful twist on traditional cinnamon rolls.
These rolls feature a tender, sweet yeast dough filled with a mixture of white chocolate and crushed peppermint candy, which gives them a festive and minty flavor.
My various cinnamon and sweet rolls are extremely popular in the family and are requested often!
I always make them for the holidays and typically make two different kinds.
These Peppermint White Chocolate Sweet Rolls are technically not holiday cinnamon rolls because there is no cinnamon, but everything else is the same!
Homemade cinnamon rolls are the perfect special treat to start a holiday off with. And these one specifically as a Christmas morning recipe! With their sweet nature, they are great for either a breakfast, brunch, or dessert sweet option.
And what I love best is that these work wonderfully when you make them the day before. This means you don’t have to get up insanely early to make the rolls plus breakfast is easy.
There is enough going on that day, so prepping what you can in advance like overnight cinnamon rolls is the way to go!
Ingredients
You can find a full list of ingredient quantities in the recipe card below.
Here is what you need to make this recipe:
- Active Dry Yeast – you can also use Instant Yeast (see Baking with Yeast section below)
- All Purpose Flour
- Milk
- Sugar
- Unsalted Butter
- Eggs
- Cream Cheese
- Peppermint Extract
- Candy Canes – crushed
- White Chocolate Chips
- Water
My husband is completely obsessed with peppermint anything so he loves this time of year.
These overnight cinnamon rolls have a good punch of peppermint, and he was still asking for more!
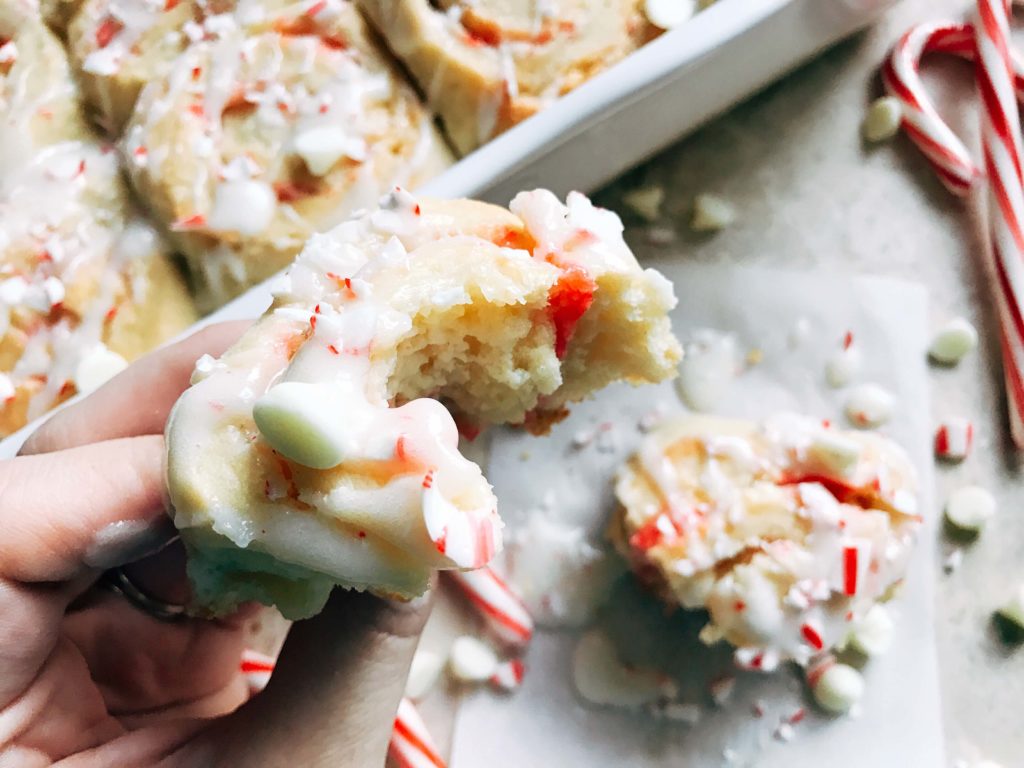
The filling ingredients of the Peppermint White Chocolate Sweet Rolls tend to melt in the baking process, however their flavors are left behind.
There is a wonderful hint of white chocolate and sweetness balanced with the sharp and strong peppermint.
Instruction Overview
First you need to make your dough.
Mix the yeast and warm water together
Make your dough and stop adding flour when the dough is tacky but not too sticky.
Knead the dough until you can stretch it very thin. Then let it proof in a covered bowl to double in size.
Now make the cinnamon rolls by rolling the dough into a rectangle.
Spread out the filling ingredients across the dough.
Roll up the dough into a long log.
Cut the log with a serrated knife into your 12 rolls.
Put in a baking dish that has more butter and sugar on the bottom, and let them proof again to rise.
Then bake the rolls until they are cooked through and turning a light golden brown on top.
Let them cool before adding the icing and topping ingredients.
Baking with Yeast
Baking with yeast can be a little intimidating as well if you are not used to it. I have made MANY batches of cinnamon rolls, and have used both instant and regular yeast.
Here are my tips!
- Yes, you can use instant yeast instead of the regular yeast.
Instant yeast means you do not need to knead and proof the dough. Just skip steps 1, 6, and 13 in the instructions. The rolls will come out a little denser, a little smaller, and with sharper, less rounded edges, but still taste great and cuts down on the time you need to make these! - A thermometer is best to read the temperature of the water if using regular active yeast, but is not necessary.
If you do not have a thermometer, make the water warm but not hot (hot will kill the yeast and it will never rise). - When kneading the dough, you are done when it is a little tacky but not sticky. If you press your finger in it, it will slowly bounce back. And when you stretch it out thinly, you will be able to see light through it with little breaking.
Making Cinnamon Rolls in Advance
These sweet rolls can easily be made in advance, making an easy breakfast or brunch!
Make them all the way through baking when cooking in advance. If you put the raw dough in the refrigerator, it will collapse and never be the same again.
I also recommend not adding the topping until you are serving. This way you can easily reheat them without the frosting melting all over the place.
Reheating Cinnamon Rolls
You can easily reheat these rolls for serving, if desired.
The easiest way is to microwave them, but you only need 15 seconds or so for a roll! If you heat in the microwave too long, they will get hard as they cool off.
If you want to heat the entire tray, cover it and place in a warm oven for about 30 minutes.
Love cinnamon and sweet rolls? Check out our other flavors and the complete list here!
Blackberry Toasted Coconut Sweet Rolls
Chocolate Hazelnut Coffee Rolls
Kim’s Tips
It is important that the water for your yeast is not too hot, because it will kill the yeast and not rise. I like to use a kitchen thermometer but you can also go by feel.
You may need more or less flour. It is more important to go by feel than use what is listed in the recipe, as different flours have different moisture content, and different environments will also affect this.
These can be made in advance, but you need to make them all the way through baking. I found that if I put the raw dough in the refrigerator that it flattened and did not puff back up.
FAQs
What is considered a sweet roll?
Sweet rolls are a sweet baked dough typically with fillings. A cinnamon roll is an example of a sweet roll.
Is there a difference between sweet rolls and cinnamon rolls?
Cinnamon rolls are rolled into a spiral. Sweet rolls are not necessarily rolled up. Here, we call them sweet rolls because we are not using cinnamon in the filling.
How do you proof cinnamon rolls?
Cinnamon rolls are typically proofed twice: once as a ball of dough, and again after it has been rolled, stuffed, and cut.

More Peppermint Recipes
Shop Ingredients

Peppermint White Chocolate Sweet Rolls
Ingredients
Dough
- 1 package active dry yeast (1/4 ounce, not instant yeast)
- 1/2 cup warm water (as per yeast package directions, typically 100-110F)
- 1/2 cup milk
- 1/4 cup sugar (plus more for dish)
- 1/3 cup unsalted butter melted (plus 1 Tablespoon, separated, for pan)
- 1 teaspoon salt
- 1 large egg
- 4 cups all-purpose flour
Filling
- 8 ounces cream cheese softened
- 1/4 cup sugar
- 1/4 teaspoon peppermint extract
- 1/2 cup white chocolate chips
- 3 large candy canes
Glaze
- 2 ounces cream cheese room temperature
- 3 Tablespoons milk
- 1 1/2 cups powdered sugar
- dash peppermint extract (approx. 1/8 tsp) (optional)
- candy cane
- white chocolate chips
Instructions
- In a small bowl, dissolve yeast in 1/2 cup warm water as per package directions for the correct temperature to ensure that you keep your yeast alive (typically between 100-110F).
- In a large bowl, mix the milk, sugar, melted butter, salt, and egg.
- Add in 2 cups of flour and mix until smooth. Then add the yeast mixture. Add another 1/2 cup of flour and stir to combine.
- Continue to add additional flour, 1/2 cup at a time, until the dough is easy to handle (the amount of flour that you need will vary). It is best to err on adding too little flour rather than too much to avoid a tough dough. I stop when the dough is not sticky but a little tacky. As you knead the dough, it will absorb more flour.
- Roll the dough out onto a lightly floured surface and knead for 5 to 10 minutes. (You can also do this in a stand mixer with the dough hook on speed 1 or 2, however it does take longer). The dough is ready when you can stretch it out and see through it without it breaking, and it bounces back when you press your finger into it.
- Place the dough into a greased bowl (you can use 1-2 tsp of vegetable oil to coat the bowl you mixed everything in). Cover bowl with saran wrap and then a kitchen towel. Let sit until the dough has doubled in size, approximately 60-90 minutes.
- When dough has doubled in size, punch it down. Then put it back on a floured surface and using a rolling pin, roll the dough into a rectangle approximately 15×9 inches.
- Combine the filling’s cream cheese, sugar, and peppermint extract in a small bowl. Spread the mixture over the dough in a thin layer. Depending on the exact size of your dough, you may need a little more to coat it all.
- Unwrap the candy canes and place them in a plastic bag. Smash the bag using something heavy like a small pot, metal measuring cup, or rolling pin until the candy canes are crushed with relatively small pieces. You will have approximately 1/3 cup of candy cane pieces.
- Sprinkle the chocolate chips and candy cane pieces over the cream cheese filling. Use more or less as needed to cover your dough to your preference.
- From the long edge, tightly roll the dough all the way to the other long edge and pinch dough together to seal.
- Using a serrated knife, cut the log in half. Then cut each half into half again so that you have four equal pieces. Lining up two pieces at a time, cut each into three rolls so that you have a total of 12 rolls.
- Coat the bottom of your 9×13" baking dish with some additional melted butter (approximately 1-2 Tablespoons) and sugar to coat. Place the cinnamon roll slices close together (four rows of three) in the dish and let them rise until the dough has doubled again, approximately 45 minutes.
- Preheat the oven to 350F. Once the rolls have doubled in size, place them in the oven and bake for about 30 minutes or until they are starting to brown.
- While the rolls are baking, prepare the icing. Whisk the cream cheese in a stand mixer until creamy. Add the milk and whisk in until combined. Add in the powdered sugar and whisk until smooth. If you would like to add some peppermint extract in the glaze for a stronger flavor, do so now and combine. If the cream cheese is lumpy, you can heat this mixture at any point in a microwave safe bowl for 10 seconds at a time until smooth again.
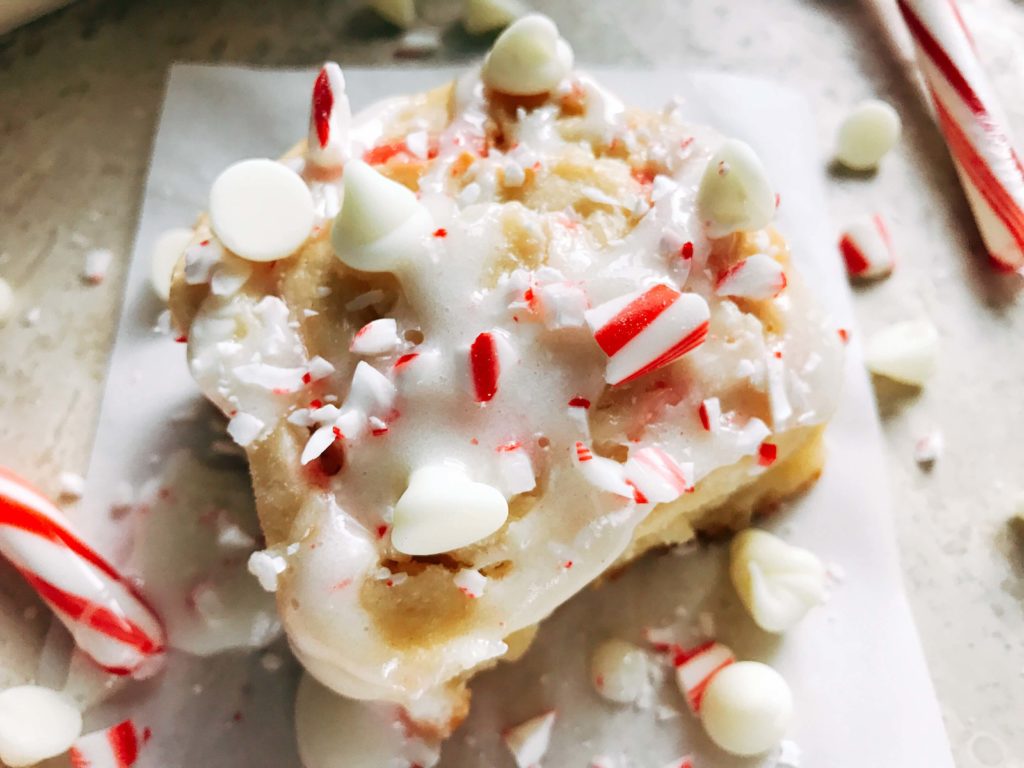
- When the rolls are done, let them cool slightly and then top with the icing. Finish with sprinkling additional white chocolate chips and another crushed candy cane as desired. Serve warm.











These look so delicious.. Love the idea of crushed peppermint. Thanks
I absolutely adore cinnamon rolls but too scared to try making them from scratch. However you’ve made these sound achievable and I adore the addition of the candy canes.
Hi Claire,
I was worried at first too, but you can do it! The most important part is just to make sure that you do not add too much flour and you will be good. (Too much flour makes the dough too dense and stiff). Just add enough so that the dough is not sticky and knead away!
I make cinnamon rolls for Christmas each year, this looks like a great recipe to try!
These sweet rolls look so festive! You can’t go wrong with peppermint and chocolate combo 🙂
I love the combo of the peppermint and white chocolate! I agree with your husband that hard to have enough peppermint this time of year. And I really like the idea of making the rolls ahead, then popping them in the oven the next morning. How long does it take for them to warm up to room temp?
Hi Annemarie,
I just let them sit out above the stove while it is preheating and that works just fine. You just want to avoid the dish being ice cold when it goes in the oven!
These would be absolutely perfect on Christmas morning <3
-Clarissa @ The View From Here
Those are so christmassy <3 I can feel their smell in a cold morning, alongside the warm cup of coffee! I will sure try them out soon, thank you!
If you prep it the day before, how much out of all the steps do you do the day before?
Hi Amanda, I go all the way through cooking them. You can complete the entire recipe including frosting if you want in advance and they will hold, or make frosting right when ready to serve. I found that if I put the rolls sliced but uncooked in the refrigerator, the yeast fails and it collapses. So at least get through the baking step!
Thanks! So if I made them the night before and heated them up in the oven the next day right before serving, how long do you recommend? Or is microwave doable?
I normally microwave, about 15 seconds for each individual roll seems to be perfect. If you microwave too long they get crunchy. You could probably put them all in the oven on warm or a low setting, with tin foil on top to help trap in moisture and keep them from browning more. But I have not tried the oven method 🙂
I just took them out of the oven! They look great!!!
Wonderful! I am sure they are perfect!
These are DIVINE! Everything about them is perfect!
Yay I am so glad you like them!!